Over the past year, our way of eating has changed. Drastically.
Once a “Cream-of-Chicken-in-Everything” kind of family, I now try to keep all ingredients as fresh and clean as possible. We stay away from dairy, sugar, and processed foods. And I attempt to keep pretty close to that “Dirty Dozen” and “Clean Fifteen” policy when it comes to buying organic items.
In other words…
We. Are. Broke.
Y’all, my food budget is embarrassing. It is completely taking over our bank account.
I feel like I’ve chosen being poor over feeding cancer to my family. Good choice, but still…
Christmas is in a couple of weeks and, “Guess what kids?!? You get to eat organic chicken all year, so all of your Christmas presents will be coming from Mommy’s craft workshop. Merry Organic Christmas!”
Fancy Shmancy Expensive Diet = Broke = Homemade Christmas Presents.
Anyway, this post has nothing to do with budgets or diets or organic hot dogs. That was just to confuse you. 🙂
Rather, this post is all about finding something special to give to my precious children using what’s left of our shredded, mutilated budget.
Hence the title: “How To Make A Fantastic Playhouse Out Of A Cardboard Box.”
Y’all, this playhouse is too cute. And cheap. And easy to make.
If I can do it, you can totally do it. It only took 2 naps-worth of time to make, and cost less than $20. And my kids will be telling their grandkids one day about the super awesome playhouse that their momma made them when they were broke but it was actually their favorite present they ever received.
[Insert Disclaimer: When I say that I spent less than $20, that has a lot to do with the fact that I already had about half of the materials needed on hand.]
Ok, so how to do it.
Here are the steps for making your very own cardboard box playhouse!
Supplies You Will Need:
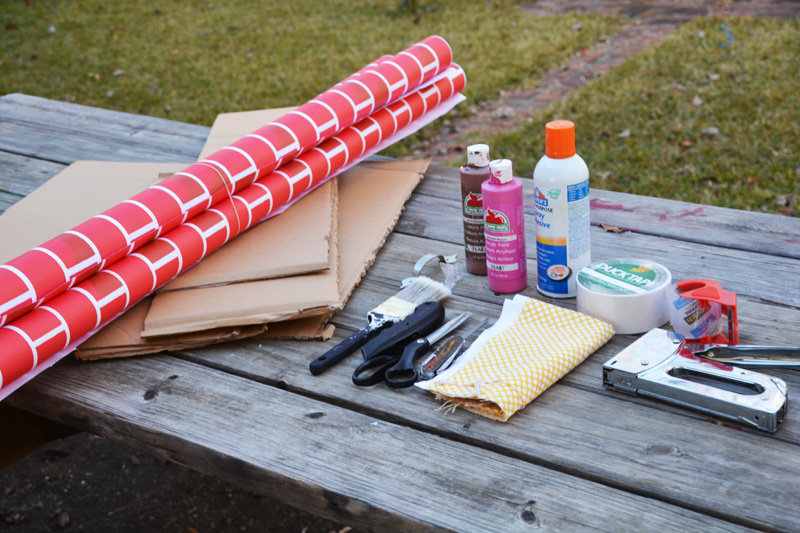
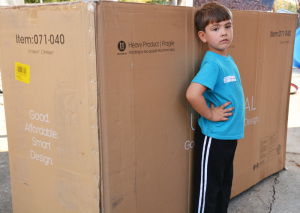
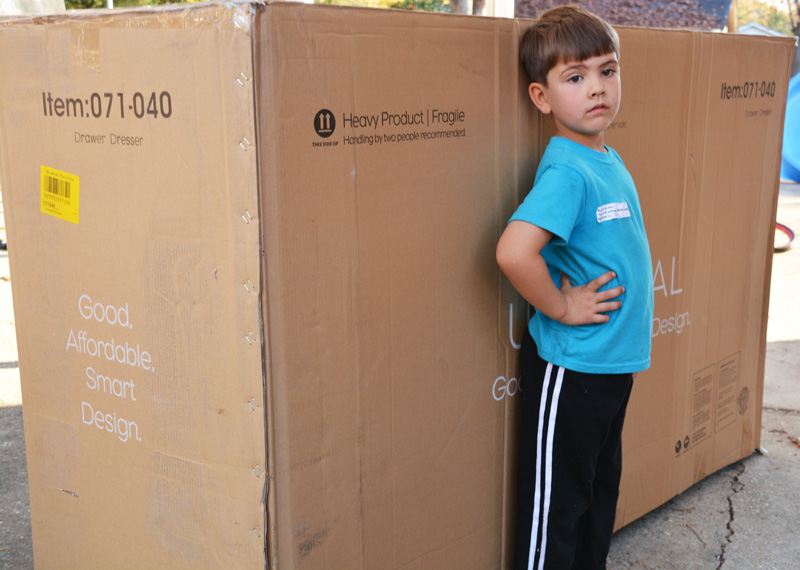
- One ginormous cardboard box. Mine was a box that a dresser came in. I asked for it from a super friendly local furniture store.
- Four medium-sized cardboard boxes. Like the size that a microwave would come in.
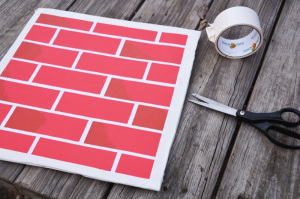
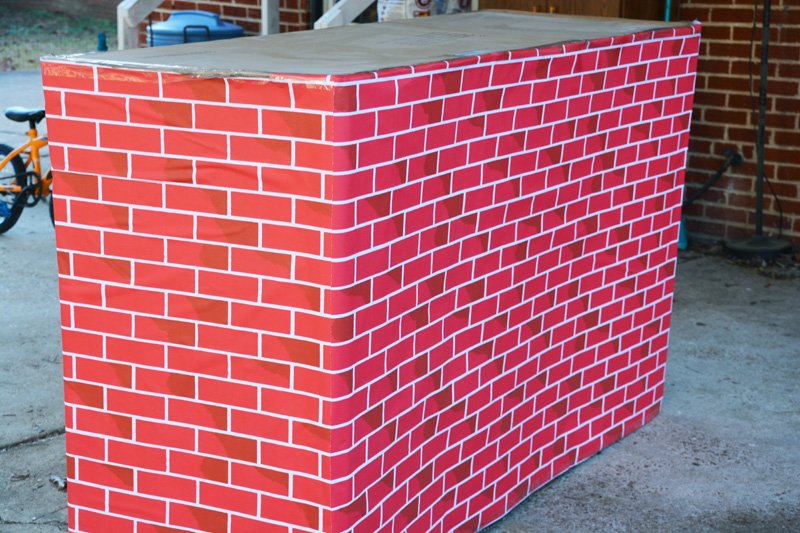
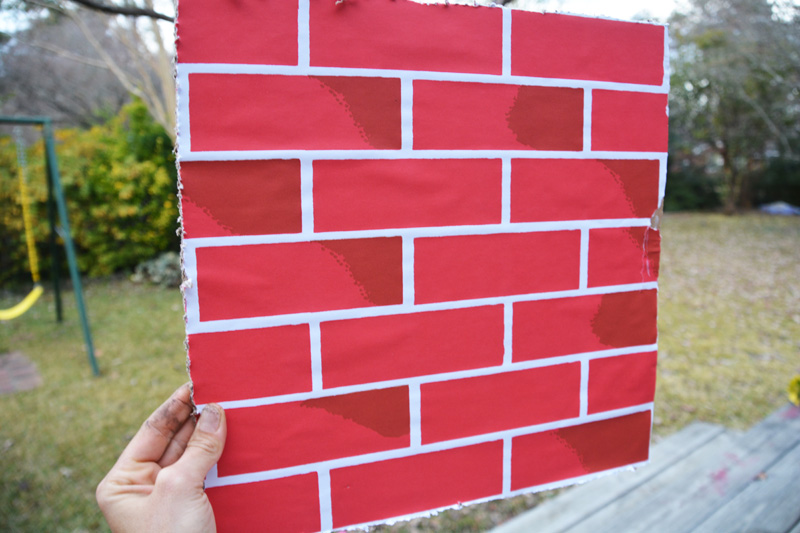
- An 11-foot roll of brick-patterned bulletin board paper. I got mine at Davie’s School Supply, and it was $6.00.
- Dark brown or black spray paint and brown craft paint.
- Two rolls of white duct tape and one roll of shipping tape.
- Scissors, box cutters, X-acto knife, staple gun.
- Elmer’s spray glue and tacky glue.
- A small door handle or knob. Mine was $1.25 from Lowe’s.
- Scrap of cloth for some small curtains.
- Cutesy stick-on numbers.
- Four small, rectangular foam blocks.
(I realize only about half of the supplies are pictured. Sorry!)
Directions:
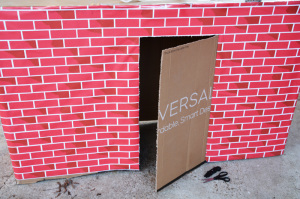
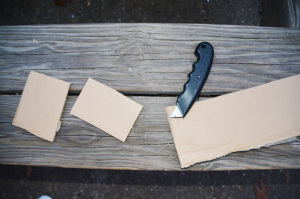
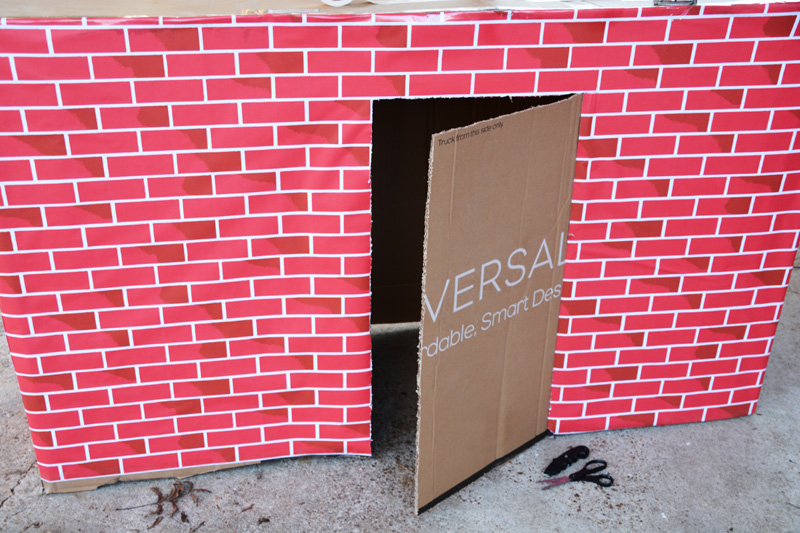
- Prepare a large, clean workspace. I worked in our carport. Trim off any small side flaps from the box. Make sure the top of the box is securely taped down and the bottom (floor) of the box is open with all flaps removed.
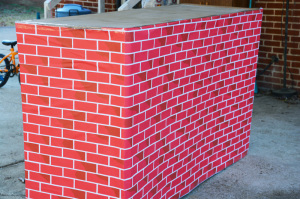
- Measure and trim the brick paper to fit the front and 2 sides of the box. Adhere using the Elmer’s spray glue. This stuff is awesome! The bond is stronger if you spray it onto the box, let it sit for just a minute, and then gently smooth the paper on top.
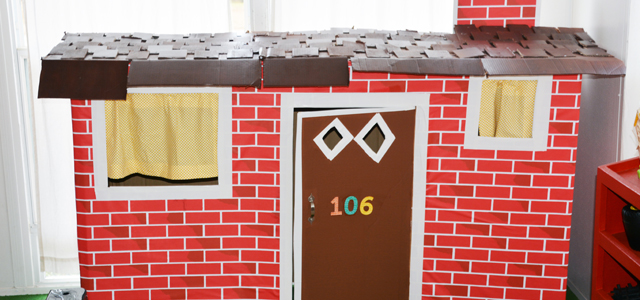
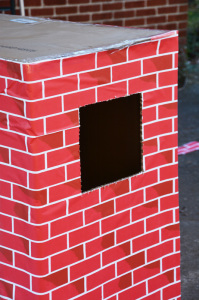
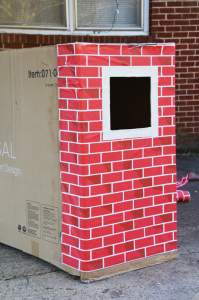
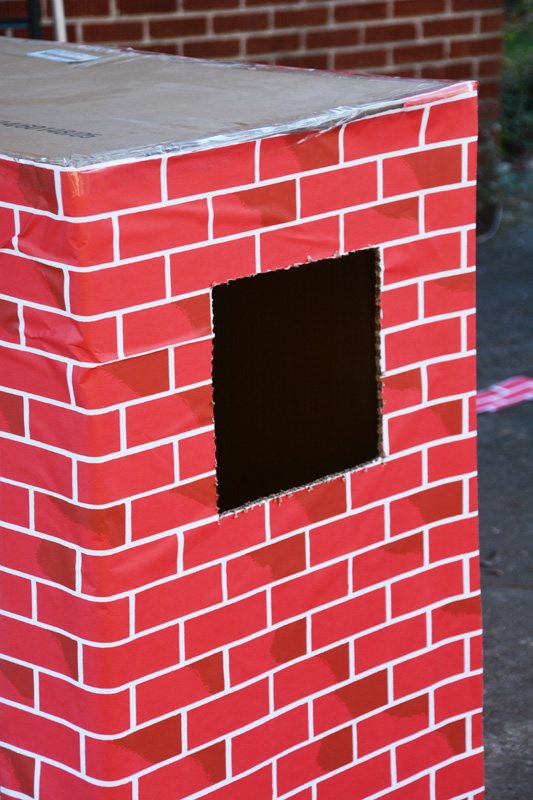
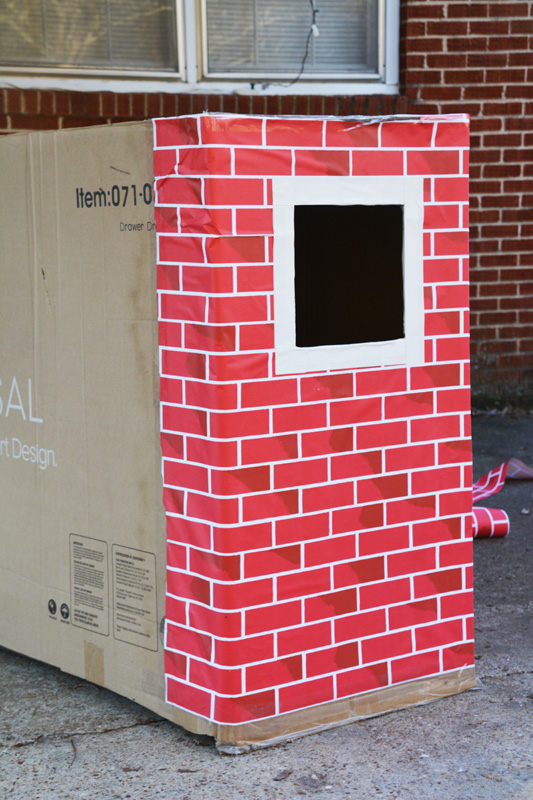
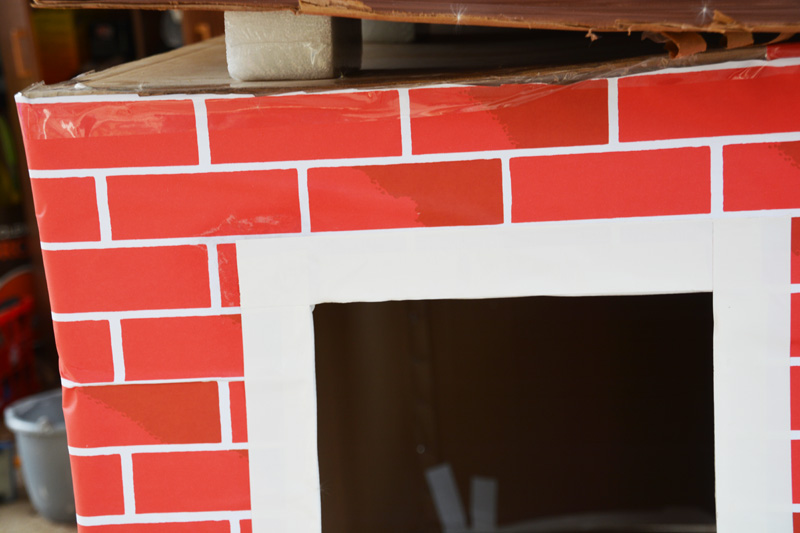
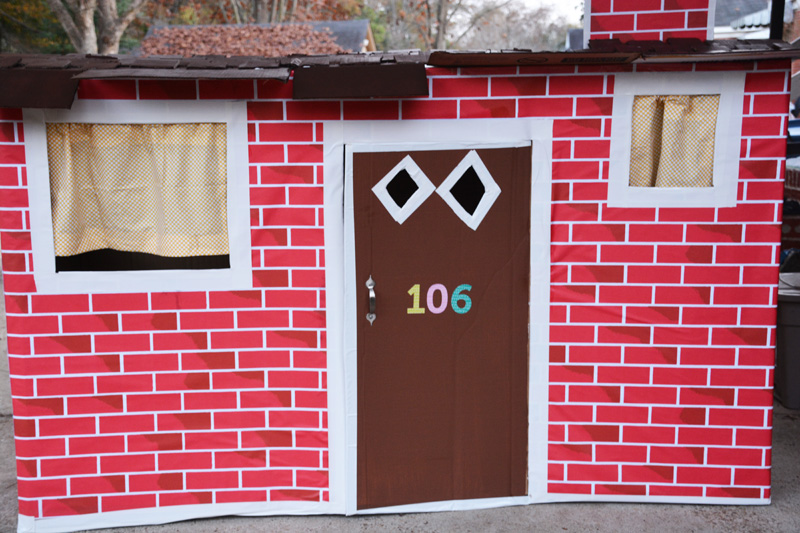
- Using box cutters, cut out your first window on one of the sides of the box. Trim with the white duct tape. (Save the square that you cut out.)
- In the center of the front of the box, use your box cutters to cut a door.
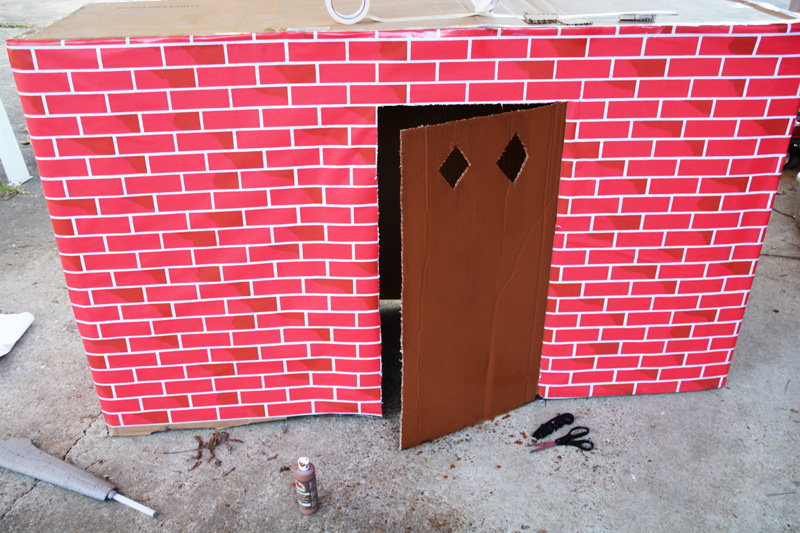
- Use your X-acto knife to carefully cut and peel away the brick paper that is on the door, then cut out some small, diamond-shaped windows in the top of the door. Paint the door with your brown craft paint. Let dry completely.

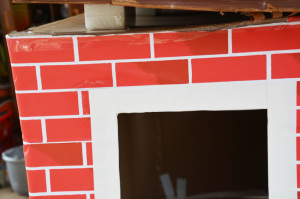
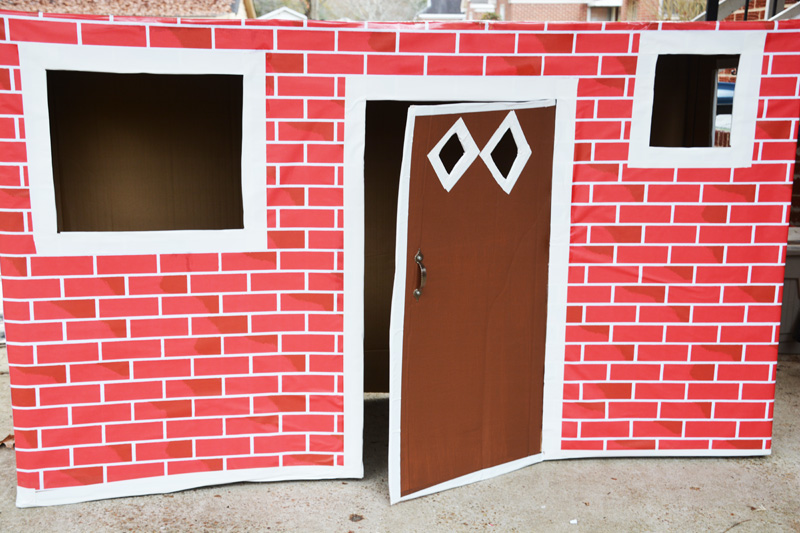
- Meanwhile, cut out the rest of the windows in your box. I put one large and one small window on either side of the door, and one more window on the remaining side of the box. Trim all of the windows with the white duct tape.
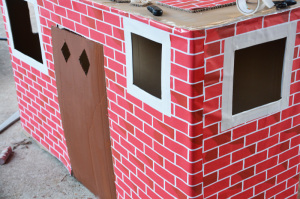
- Once the door is dry, trim it with the white tape. Attach your door handle.

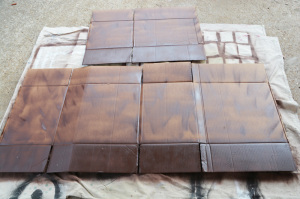
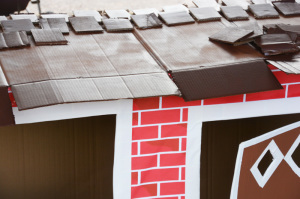
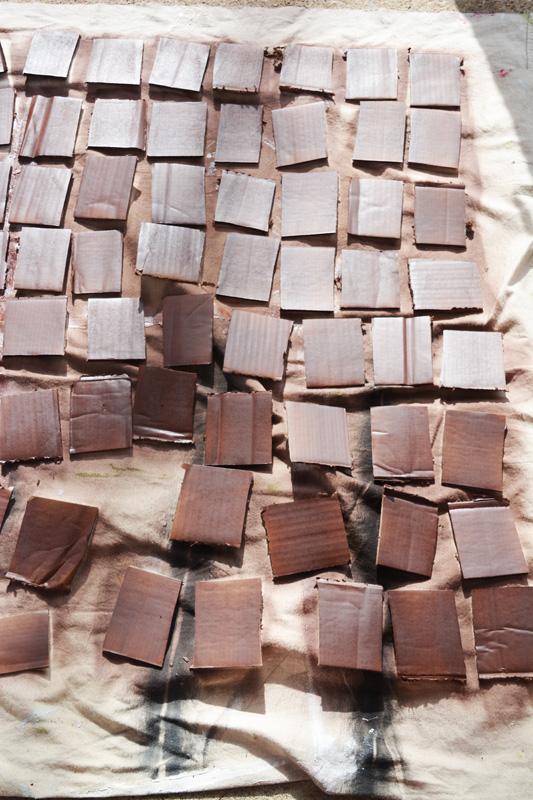
- Now for the tricky part – the roof. Start by cutting 30 gillion small shingles out of 2 of the remaining cardboard boxes. Using the X-acto knife, I cut them roughly 2 inches by 3 inches.
- Lay all of the shingles on a paint canvas and spray paint them dark brown or black. Open up and cut the remaining 2 cardboard boxes (so that they lay flat), and spray paint those as well.

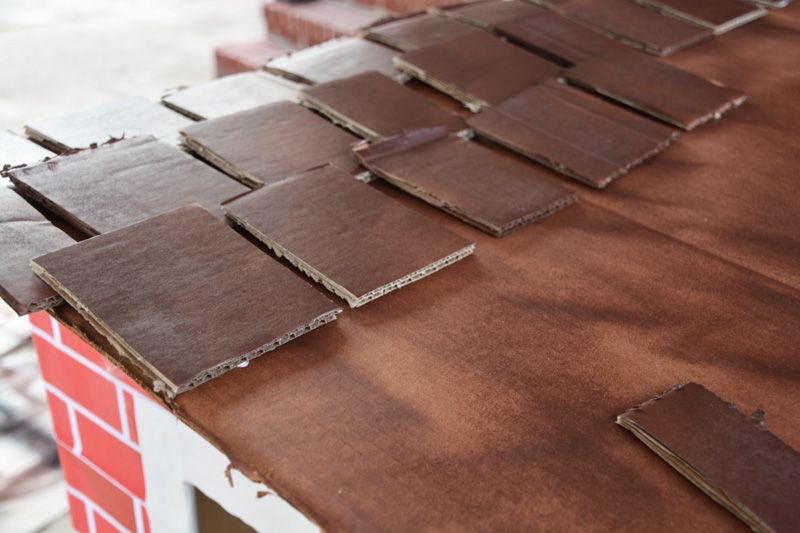
- While those dry, use the tacky glue to attach the foam rectangles to the back of the roof. Start about 6 inches in from the back edge of the box and space them in an even line all the way across the box. (Don’t unwrap them or the glue won’t stick! I glued the sticker that was on the wrapping and it worked great.)
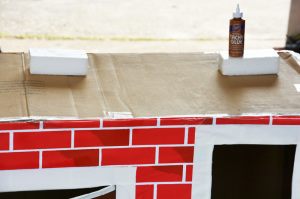
- Lay the two pieces of cardboard on top of the roof so that they lay on the foam and form a slanted roof. I let the flaps of the boxes hang over the front of the roof to form a sort of “awning.” Glue the cardboard to the foam and staple gun the front of the cardboard to your house.
- Time to roof a house! Start laying shingles, beginning with the back row. Go one row at a time, overlapping the front row over the back row just a bit. Glue and staple as you go.

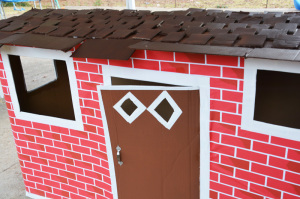
- It should start looking pretty good at this point! Now for some fun details. Use your fabric to attach curtains in the front windows. I actually used some sticks from our backyard for curtain rods so that they could open and close the curtains.
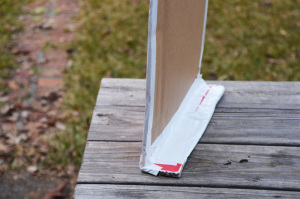
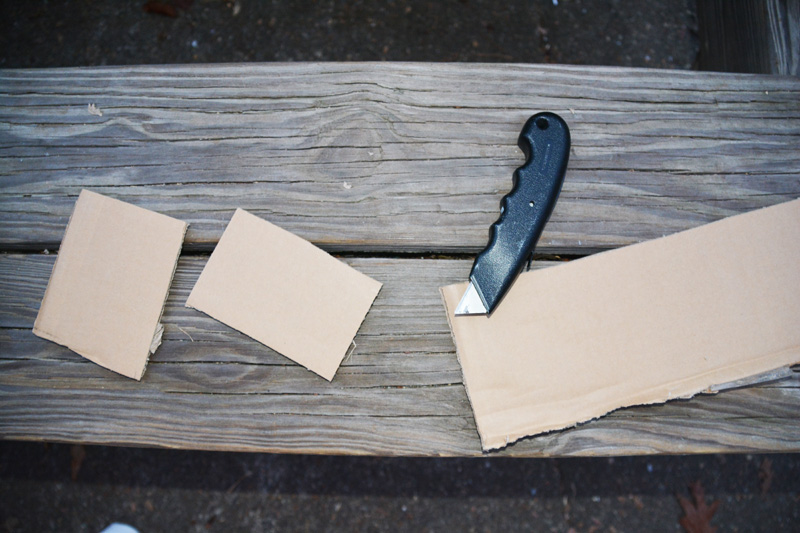
- To make the chimney, use one of the squares that you cut out from the windows.

- Trim it with some duct tape.
- Attach a narrow piece of cardboard to the bottom perpendicular to the square. I stapled it and taped it. It should be able to stand freely.
- Attach your chimney to the back of the house. You should have enough space between the back edge of the roof and the back edge of the actual house. Staple it. Glue it. Make sure it’s staying forever. 🙂
- Put some final white trim along the base of the house and then put your house number on the front door using your cutesy stick-on numbers.
- And You. Are. Done. (high five!)


So now I’m trying to “hide” this thing until Christmas day. 🙂
It was fun to make, and it’ll be even more fun watching my children play in it for…who knows how long? A year? An hour? However long this box can withstand the forceful joy of my kiddos. 🙂
And I must ask…what else could be done to dress this house up? It has good bones, but I’m no good at coming up with the pretty, artistic details. Please share your ideas!
Test
December 15, 2014 at 10:46 pm (9 years ago)Test
Beth
May 13, 2015 at 3:27 pm (9 years ago)It’s adorable. If you wanted more detail, how about window boxes with fake flowers. Or ivy growing up the walls. I’d say you hit it out of the ballpark as is!
Lauren Souers
May 14, 2015 at 8:05 am (9 years ago)I love the ivy idea! Would have never thought of that…
🙂
BestCecilia
October 25, 2018 at 4:19 pm (6 years ago)I have noticed you don’t monetize your blog, don’t waste your traffic, you can earn additional cash every month.
You can use the best adsense alternative for any type of website (they approve all websites), for more info simply search in gooogle:
boorfe’s tips monetize your website
busty girls
December 6, 2018 at 2:24 am (5 years ago)hello!,I like your writing so much! proportion we keep in touch more approximately your article on AOL?
I require a specialist on this house to solve my problem.
May be that is you! Having a look ahead to look you.