
A quick note from Lauren:
I have some exciting news to share regarding the future of AGoodTired.com…Katie Short is now a Co-Author! So, look forward to hearing a lot more from Katie…and get excited! Because everything that she has to share is not only helpful and Christ-exalting, but absolutely hilarious as well. The girl is seriously witty. 🙂 Enjoy!
And now, back to Katie…
I make my own yogurt.
Yes, I said it, I MAKE my own yogurt. This seemingly “Everest” type task is actually something I do at least twice a week.
And I have 2 kids under 2, so you know it can’t be that hard, otherwise I wouldn’t do it.
But the question is, why on earth would someone go through the trouble of even trying, and possibly failing, and ultimately wasting their time and milk?
Well, my reasons are four-fold…
- I do it for my husband. He has ulcerative colitis. The short story of UC is that the biodiversity of good bacteria living in your stomach is not so diverse… which is bad. And what you don’t know about homemade yogurt is that it has up to 100x more good bacteria for you than the best store-bought brands. So, in summary, it makes his tum-tum feel good.
- I do it for my wallet. It costs about $1 per quart.
- I do it for the time. Although is does take some time, it is 90% hands off. And like I said… with 2 kiddos, I don’t have a ton of this to spare. None in fact.
- I do it for the quality. The yogurt I make is creamy and thick and awesome.
So let me share my homemade yogurt recipe with you to help make your gut, your wallet, your busy day, and your taste buds happy!
There are actually tons and tons of ways to make yogurt. So many ways, in fact, that it can be tough/annoying/life-sucking to determine the right way. Well, I’m going to share my secret with you … I make mine in a cooler. I would like to personally give a shout out to my friend Danellen for teaching me this method, because it has saved my sanity. No need for yogurt machines or crockpots or even ovens… all you need is just a cooler. Sounds classy when you say it doesn’t it?
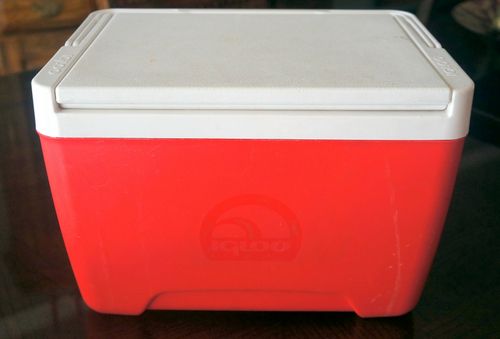
This particular cooler was made available to me because my husband refused to use it as his lunch box for work anymore… he said it made him feel like he was delivering a heart to be transplanted.
Materials needed:
- Cooler large or small, just needs to be insulated.
- Candy thermometer (Purchased mine at Wal-Mart).
- Jars with lids (You can use old mayo jars, peanut butter jars, fresh never-been-used quart jars, or whatever. But if you make more than one jar at a time I would make them the same size).
- Milk (The fattier the milk, the creamier the yogurt. I use whole milk.)
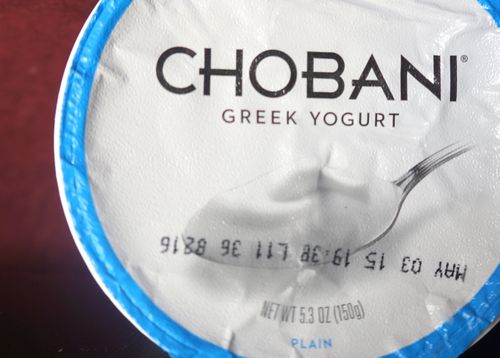
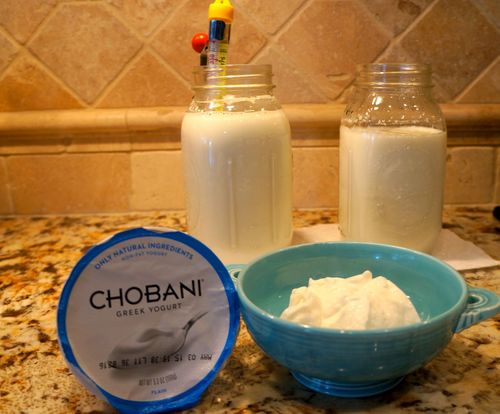
- 1 small container of Greek yogurt (Plain or vanilla… experiment with flavors once you get used to it. Don’t be a hero.)

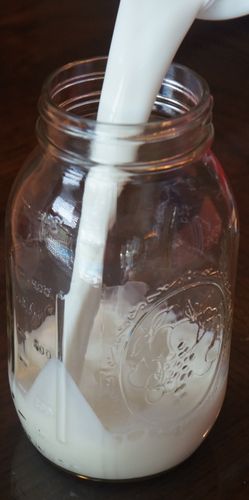
Step 1:
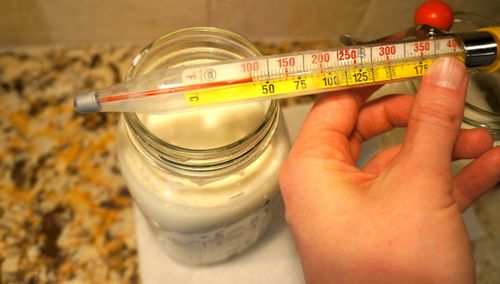
Fill a jar ¾ full with milk. With the lid off, place jar in a pot of water with thermometer attached. Cook milk on medium heat until it’s scalded and you see small bubbles form at the top (thermometer reads 180-190 degrees).
(Tip: Have an old wash cloth at the bottom of the pot to keep the glass jars from knocking around, and breaking)
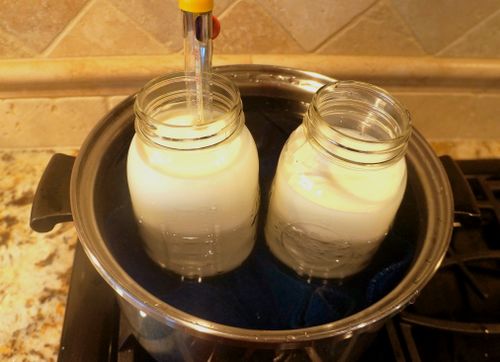
This takes approximately 20 min or so. Yes, you could cook it faster if you turned it up, but the water can boil over easily… so unless you want to run to the stove every 2 minutes because you hear water burning, keep it on medium. Again, don’t be a hero.
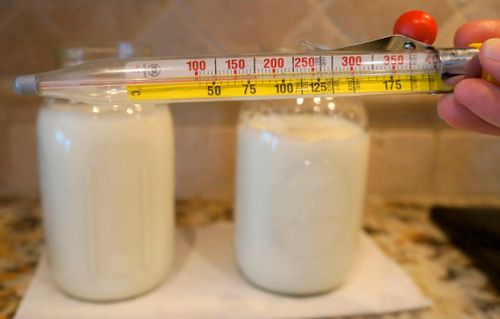
Once scalded, take jars out of the water to allow them to cool down (no lower than 90 degrees and no higher than 115). This should take 45 minutes to 2 hours (depending on if it is summer or winter), but to speed up this process you can put it in the fridge.
Step 2:
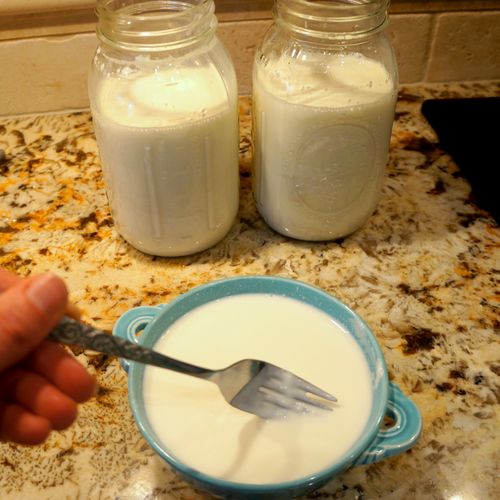
While the milk is cooling, dump the entire Greek yogurt, also known as the “starter”, into a bowl and set aside. You want it to be around room temperature when it’s time for you to use it.
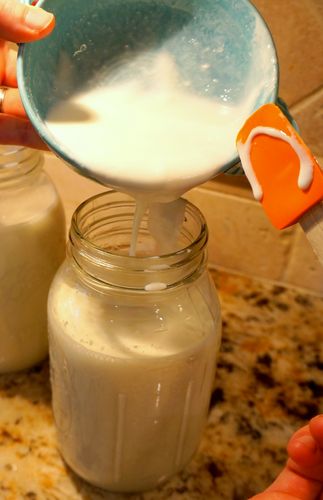
Step 3:
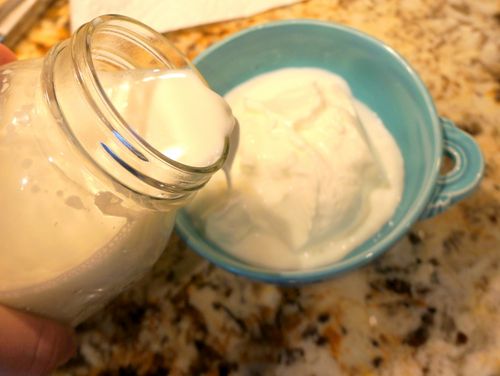
Once the milk is cooled between 90-115 degrees, pour 1/4 cup of the warm milk in with the Greek yogurt you have sitting on the side (if you are cooking more than one jar, pour some milk from each jar). Stir with a fork to help it dissolve and let this sit for 1-3 minutes. Now pour this wonderful greek yogurt/milk concoction back into the jar and stir again to combine fully (disperse equally among jars if cooking more than one).
Step 4:
Put the lids on the jars and now place them in that classy cooler. Pour in 2-4 cups of boiling water (if cooking for a short period then add 2 cups, if cooking for longer add 4 cups).
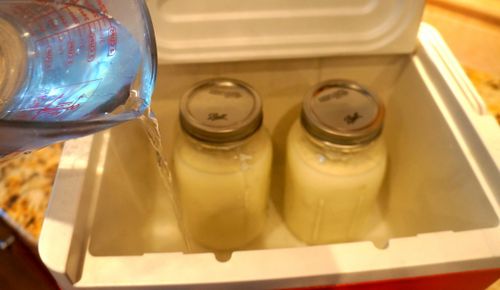
Close lid. After 6-8 hours you will have a wonderful yogurt, but if you let it sit longer (12-24 hours) it will continue to thicken. I personally let mine incubate for 24 hours because at that point, MILLIONS more good bacteria have been produced and have eaten all the sugar (meaning a better tum-tum for hubby). Any whey that has separated at this point, I simply pour off.

Tips I’ve learned through trial and lots of error…
- You want to keep the milk incubating in your cooler at a temperature between 90-115… this is the perfect range for good bacteria to grow. Too hot they will die, too cold they won’t grow.
- The closer you keep your yogurt incubating at 115 the sweeter it will be, the closer to 90, the more tart it will be.
- If you are going to cook past 12 hours, plan to add more hot water to the insulated cooler.
- Sometimes I cover my cooler with a towel and put a piece of tin foil just inside the lid to further insulate
- After a few hours whey will begin to separate from the milk. If you pour this off, your yogurt will be thicker. If you stir it back in, your yogurt will be silkier.
- After scalding, skin will form on the top of the milk. Scrape off with a spoon before combining with the starter. Trust me, you’ll thank me later.
I definitely killed my yogurt the first time I made it or maybe the first 2 times, but that was probably because I kept checking the temperature like it was my J-O-B. However, I only got better! By the way, I should mention I’ve only been doing this for about a year. Now, my family doesn’t even like the taste of store-bought yogurt… it just can’t hold a candle to the homemade, straight-from-the-cooler kind.

John Smith
April 10, 2015 at 8:51 am (11 years ago)I like yogurt. I tried 35 years ago to make my own yogurt and didn’t do so well. This looks like a much better recipe/process and will try again.
Thanks Katie Short,
John Smith
Katie Short
April 10, 2015 at 8:55 am (11 years ago)Hate it didn’t go well for you 35 years ago… I hope this goes a lot better! My favorite way to eat is with honey, cinnamon and nutmeg! YUMMY!
Shel
April 17, 2015 at 12:14 am (11 years ago)Funny I came across this while looking for a way to kill the stupid ants. My dau in law (who lives with us at the moment) and I have been attempting to make our own yogurt. Mostly cuz we were going through about 40 of those little cups that are $1 each every couple of weeks. She loves it, my 1 yr old granddaughter loves it, my daughter loves it, my son takes my Key Lime Yogurt to work (grrr). Anyway, the first batch turned into yogurt OK, but the texture is kind of slimy. Eww. Not crazy about it. DIL read about how to do it in a crock pot. Seemed ok, but she was only half awake when she was supposed to turn the crockpot off and wrap it in towels. She wrapped it great, but didn’t turn it off. We had a big caramelized, weird, sticky, icky mess. Couldn’t say anything, cuz it’s totally something my old ADD brain would do. So, she tried another batch last night, it didn’t “yogurt”, it’s still mostly liquid with a few yogurty-ish clumps in it.
Your method looks very easy, I’m gonna send her the link and let her try again. (I’m the bread department, she’s the yogurt department. I told her if we specialize she can’t move more than 10 miles away from us, lol) We already make our own ricotta and can anything that holds still long enough. We’re turning into Martha Stewart. :0)
Any ideas about the slimy texture? I’m going to drain it to make it thicker and we can probably still use it in smoothies and for baking, but it’s kinda weird for just eating. I’d like to find out why it did that so we don’t do it again.
katie short
April 24, 2015 at 1:22 pm (11 years ago)The slimy texture is from the whey not separating very much. Usually out of a one quart jar, I separate out 1-1 1/2 cups of whey. The more whey you separate, the thicker it will be. My husband prefers the have it silky/ slimy because… I don’t know why. 🙂 he just likes it I guess. But to me, the thicker the better. If you use CHOBANI as a starter, more whey will separate. Don’t ask me why.. it just does. If you use FAGE, zero whey will separate. To save even more money, buy a large tub of yogurt, that way you can make several batches. Use about 2-3 tablespoons from the starter yogurt. Hope this helps!
Jennifer
April 19, 2015 at 2:34 pm (11 years ago)Are you checking the temperature of the milk after it’s in the cooler, or checking the temperature of the water? How do you make sure it’s staying the right temperature?
katie short
April 24, 2015 at 1:17 pm (11 years ago)I check the temperature of the milk, not the water. Good question about keeping it the right temperature. To keep the temperature where you want it for atleast 10-12 hours do this: after putting the yogurt in the cooler with hot water, put a piece of tin foil between the tops of the jars and the lid. THis will help the lid of the cooler to close more tightly and will keep the heat in longer. After it’s closed, I put 1 or 2 kitchen towels on top of the cooler. Again.. just futher insulation. I don’t know what temperature this keeps the inside exactly…but I do know that I don’t have to check and add hot water but once ever 12 hours or so. Hope this helps!!
Carrie
April 20, 2015 at 6:24 am (11 years ago)Katie,
Once you’ve got a batch of your own, can you use it for the starter or do you keep going back for the store bought starter each time?
katie short
April 24, 2015 at 1:06 pm (11 years ago)I can use the cooked batch as a starter. But if you want MAXIMUM bacteria, it is best to start from a store yogurt every 3 or so batches.
Nick B
May 17, 2015 at 5:55 am (11 years ago)Thanks for posting. Your method seems very convoluted, I’ve been making my own yogurt for over 7yrs and got very excited when I saw your cooler pic, thought I might learn a trick or tow – but instead I’ll teach you to simplify your method. First, lose the jars: get an anodized pot, and use the whole 3-bag-milk (4L) for your base and pour the entire volume in the pot (forget this water nonsense).. Bring it up to 180deg like you say: either put on the lid and keep it on medium heat, or put it on high heat and use a wooden spoon to stir constantly, takes less than 9min – if you don’t stir, the bottom will develop a burned (browned) layer which MUST BE removed before proceeding further or else your batch will spoil. If you choose the medium heat + lid, you’ll need to decant your hot milk into another vessel to remove the scaled base at the bottom of your pot (which I used to give to my dog, he loves it).
Next, cool your milk to 110deg like you say: I submerge my pot in my kitchen sink filled with cold water. This takes about 10min as well (now you’re at 20min of labour). Once your milk drops to 110deg, add no more than 250ml of plain yogurt of your choice (not less than 2% or you’ll end up with kefir instead of yogurt) – I used 3.25% Greek yogurt as my base 7yrs ago and it’s still going strong. Stir the 250ml base into the 4L milk for 1min to dissolve it.
Take your cooler and line it with a fleecy blanket (drape it over the open cooler). Put the lid on your pot and place it in the blanket; wrap it over the pot lid, and close the cooler cover – this will thermo-insulate your stuff INSIDE the cooler, skip this tinfoil nonsense and the temperature and water checking. Add nothing else I the cooler, no hot water, no nothing: close the cooler lid and leave it under a table undisturbed for 8-10hrs but no more than 12hrs and no less than 8hrs.
Take the pot out of the cooler, and put it in the fridge for 36hrs undisturbed. Then, open and enjoy. Note that the lid of the undisturbed pot will have condensation formed, which will also drip onto the yogurt top layer: gently skim that off with a plastic spoon when you open the pot after the 36hr refrigeration. I normally skim off the top 1/4″ layer anyways because it’s always unexplainable sour. After the first serving and after the first day, you’ll notice the whey separating INSIDE the pot – I normally take my first serving with a ladle so I make “a crater” in the pot, which fills with separated whey: this makes scooping it out easier the next morning.
You could, if you wish, break your yogurt batch into bowls and containers after the first serving. Often what I do is about 48hrs after the batch is COMPLETE for serving, I fill my next 250ml base and store it in the fridge with an airtight lid, for the next batch – this sample should have as little whey in it as possible, which is why I wait 48hrs before extracting the sample.
As an aside: you heat the milk to 180deg to cook off the bad bacteria but leave the good bacteria intact – heating over 180deg will render your milk dead and useless; heating it to less than 175deg will make your yogurt tart and chunky. Cooling the milk down to 110deg and adding your batch results in the bacteria development as you described. But you’ll want to STOP THE PROCESS after 12hrs, or else you end up with curved cheese, which is why you need to refrigerate for 24-36hrs; the less you refrigerate, the “slimier” your yogurt will be, but leaving it longer than 48hrs before skimming the top will start making your yogurt go yellow and then pink with dead bacteria at the top (which you can still skim off and throw out, and eat what’s below, which is still perfectly fine). Your refrigerated – and skimmed off top to maintain a clean pure white product – pot of yogurt can last up to 6 weeks in the fridge for continuous consumption. But DON’T FORGET TO SAVE A SAMPLE for your next batch.
Summary: add 4L homo milk in anodized pot, bring to 180deg stirring constantly (10min); cool pot in sink with cold water to 110deg (10min); stir in 250ml plain yogurt base (4% is best). Cover pot with lid, wrap in fleecy blanket and put in cooler for 8-12hrs, then transfer pot into fridge for 24-36hrs. Skim top, then enjoy; 48hrs later extract 250ml sample for your next batch.
Closing note: if you add 1L of 10% to your 4L of 3% milk, your yogurt will be even thicker and sweeter. If you add 1L of 18% instead, you’ll need to increase your base to 300ml or else you’ll end up with runny yogurt – I guess there’s too much fat for the bacteria to develop properly or fully, I don’t know the exact scientific reason for it…
Katie Short
May 18, 2015 at 8:47 pm (11 years ago)Thanks?